No one is a perfect colorer…
…especially not in the beginning stages
It can be pretty easy to assume that your Copic Marker idols popped out of the womb with a Copic in one hand and a certificate of genius in the other.
But the stinkin' truth is that everyone starts out rough.
Really rough.
There is a definite learning curve to coloring with markers. It takes time and practice to develop good marker skills.
I teach a lot of marker classes
And the one thing I notice is that everyone screws up.
Everyone.
The thing is, we all don't screw up in the same way. Every beginner has a different set of hurdles to overcome. Some people have hesitancy problems, others are over-eager.
Every student I’ve ever met has two or three technique flaws that lead to less than stellar projects.
What's interesting though, is that while student A has 3 problems and student B has 3 problems, once you see enough colorers, you realize that all students make similar mistakes, the only thing that changes is the combination they come in.
So to help you diagnose what goes wrong when you sit down to color, let's look at five MORE of the most common mistakes I see from beginners.
Correct these mistakes and you're not a beginner anymore!
MORE mistakes? Yep, today we're covering Mistakes #6 through #10.
Don't miss the first article 5 Mistakes which covers Mistakes #1 through #5, here.
In the last article, I used a puffy red heart to illustrate mistakes. This time we're doing blue-violet balloons.
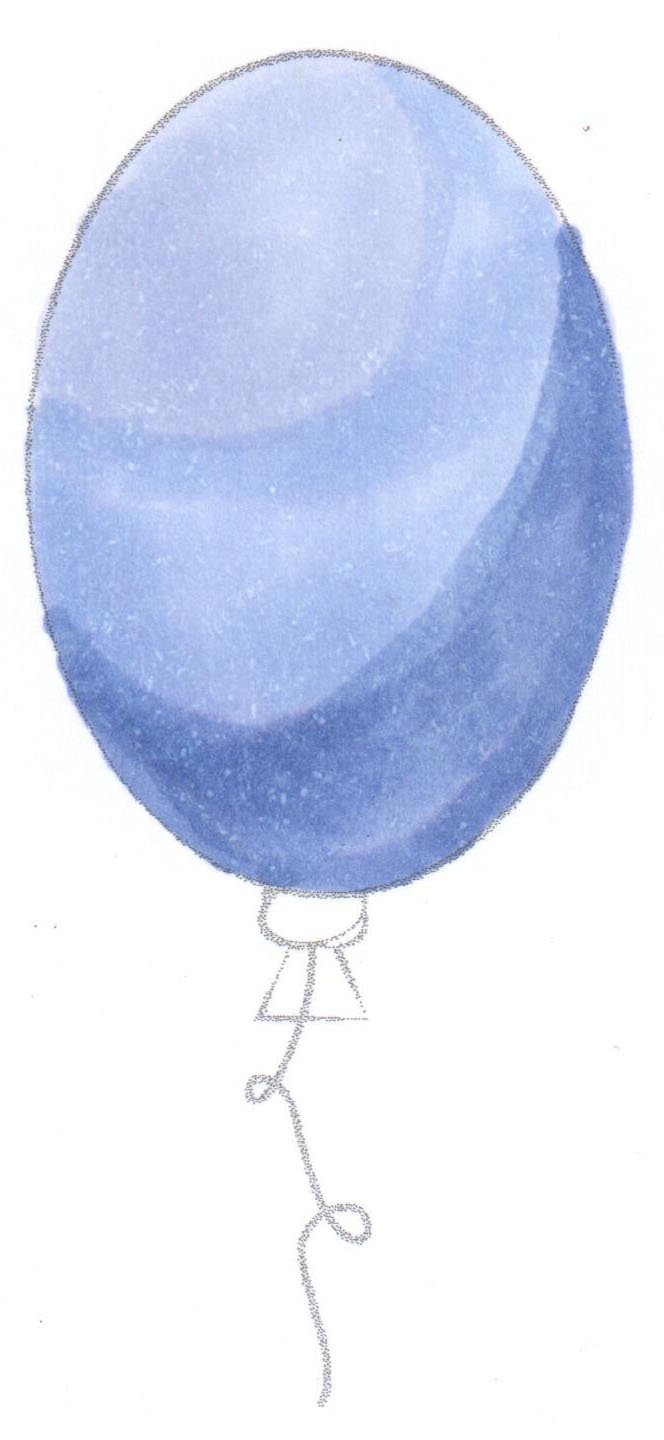
Here’s a good-blending sample. I used BV04, BV02, and BV01.
This isn't going to win me any prizes at the County Fair, especially since this balloon measures only 1” tall in real life and has now a high resolution, blown up giant... but it is a fairly good example of the kind of smooth blending to shoot for.
Each ink color blends into the next in a fairly smooth manner. The lights are light and the darks are dark with no jarring streaks or blobs to ugly-up the image.
So now that you know what pretty good coloring looks like, let’s take a look at some typical bad coloring and how to fix it.
Mistake #6: Coloring in blocks
Smooth blending should be a gentle transition from one marker color to another. The transition zones are key.
Think of a transition zone as a series of overlapping halves. You use markers A and C. Where the two colors overlap creates color B.
Where markers C and E overlap, you create color D.
To be clear, colors B and D are not actual marker colors, they're colors that are created when you transition between two markers.
In my pretty sample above, I overlapped BV04 and BV02 allowing them to magically create a BV03 section. I did not use BV03, I created it.
Same thing with BV02 and BV01. Those inks mixed and mingled to form the equivalent of a BV01.5.
It's all about the mixing.
But mixing can not happen if you color in blocky sections, as shown here.
The Fix:
Block colorers are not using flick strokes and that’s why they end up with stripes or blocks rather then transition zones.
They're physically laying down the correct colors but without the overlap, the inks barely touch each other and never get a chance to blend.
This is a flick stroke, it's a controlled pattern. I've used flicks here to concentrate the heaviest coat of BV04 down where the balloon is the darkest. As I move upwards, the flicks taper off, like little fingers. There is less BV04 ink at the top edge of my coloring and more down at the bottom.
Essentially, smooth blending is all about easing into the transition zone. Easy transitions lead to smooth blending.
It's much easier to blend finger zones to finger zones because there's less BV04 in the upper region for the BV02 to fight with.
Using flicks rather than coloring in blocks will improve your ability to blend inks in the transition zone and to form beautiful middle tones.
A quick note about blocky coloring: You may be a block colorer and not know it! If you typically color quarter-fold card sized stamps with Copics, you are likely coloring in blocks. The teeny-tiny size hides a lot of technique flaws! It’s usually not until you try coloring a larger image that your blocky habit becomes apparent.
Mistake #7: Not enough juice
Here’s a scenario for you: You want to make a batch of pancakes.
Just for kicks, let's say you add only half the liquids. So instead of adding 1 cup of milk you use 1/2 cup. Instead of four eggs, you use only two.
How will the pancakes turn out? Will they be light and fluffy?
Probably not.
You're going to have powdery mess on the griddle. Even the dog won’t eat these pancakes.
You need moisture to make the pancake magic happen.
The same is true for markers. You need wet ink on the paper to facilitate blending.
The Fix:
I usually see dry coloring from hesitant students.
They're afraid to lay down too much color for fear of doing it wrong.
But trying to blend with only a little bit of ink is a like trying to do the backstroke in 6 inches of water. Your heart may be in it, but there's not enough moisture to swim.
In the bad balloon above, I used a really healthy amount of BV04 but then I let it cure for about 20 minutes before proceeding.
Then I laid down a very wimpy layer of BV02.
Because I was working a light layer over a dried heavy layer, I did not have enough moisture to rehydrate the darker ink.
And surprise, surprise! It didn’t blend.
Ink particles need moisture to move.
Blending is impossible in a desert.
The best blending happens when you work wet into wet. That means not waiting a long time in-between colors.
It also means being generous with the ink on every single coat.
It's not impossible to blend wet into dried ink but the process requires more ink than wet into wet. This is because ink #1 must be re-hydrated before the blending can begin. It's much easier to hit the ink while it's still fresh.
The other thing for beginners to note is that the magic doesn't always happen on the first pass.
Sometimes the two inks won't begin to blend until you hit it with a second coat.
Blending requires a sense of both timing AND quantities.
If the blend isn't what you wanted it to be after the first application, it's okay to go back and wet it again!
Mistake #8: Too much light ink
Too little ink is a problem, but so is too much ink.
Remember when I said in the last fix that blending relies on a sense of timing AND quantities?
Well, here's why you can't go overboard.
This blend was going well until I got really happy with the lightest marker (BV01).
Basically, I went back with my lightest marker and coated the heck out of everything in the light and medium zones.
Single marker fixing is a problem because now my light area is almost as dark as the dark side.
And see the weird drying line running through the transition zone? That’s a bathtub ring!
And look in the upper left area, the paper is so saturated that we’re starting to get an oil slick up there.
The Fix:
Here's something you may never have considered.
One coat of BV01 equals BV01. But what does three coats of BV01 equal?
You can easily get away with a second or third coat of most inks but when you start playing with multiple layers of the same color, all those lovely transparent layers start to add up to more than your original color.
BV01 + BV01 + BV01 + BV01 = BV02.5 or even BV03
By adding too much BV01, I've darkened the top of that balloon past the middle color. I've ruined my dark to light transition.
How do we avoid this?
Do not blend with just one marker.
Balance your applications of every color.
If you're not happy with the blend, don't grab just the lightest marker to make the fix. Instead, go back with your middle color THEN go back with the lighter.
We’re not only blending, we’re also balancing.
Reblending with multiple colors keeps your lights from accidentally layering up to be darker than your middles.
Mistake #9: shaggy coloring
When I introduce flicking, about half of the students do this.
It’s a tip flick which kinda wanders across the color zone. I call it “dinking around”. It’s like they’re saying “I’m an artist, so I make these sketchy artistic strokes.”
Dink. Dink. Dink.
Dinking is when you look like you’re busy but you’re not really getting anything done.
I think dinkers are so wrapped up in the fun of making pretty flick marks that they forget the ultimate goal of filling-in the shape with solid color.
Shaggy coloring is inefficient and a waste of time.
Shaggy strokes will never blend because you’re barely using enough ink to cover the white of the paper, much less make a blend.
Here’s the other bad thing I’ve noticed: even though a shaggy student might fix the problem, they still revert back to shaggy strokes when they get nervous or stop paying attention.
It’s a life-long tendency which you never really cure.
The Fix:
Be mindful.
Pay attention to the look of what you’re doing and not just the feel.
Flicking only works when you're generous with both the number of flicks and the length of those flicks.
Your flicks need to overlap each other, they need to touch and get really snuggly in order to cover over the white space.
This isn't just a case of the BV04 flicks not touching each other either. We've got double trouble in this example. The BV02 flicks need to come down and lay on top of a good portion of the BV04 for the actual blending to begin.
It's not enough to have coverage, the coverage needs to be layered.
Play some Barry White and turn the lights down low. These colors need to get comfy, romantic, and downright dirty with each other. If your two inks never touch, if they sit in quarantine, like wall flowers at a sixth grade dance, then they're never going to merge and mingle and make beautiful music together.
Mistake #10: Overstroking
This is not usually a first-timer problem.
This bad technique develops after a few coloring sessions, once the student gets comfortable with flicking and coloring with using lots of moisture.
Actually, this is someone who is a little TOO comfortable.
Overstroking is dancing on the edge between a pretty darned good blend and perfection.
Dancing is only cool until you tumble headfirst into the piranha tank.
If you look really closely here, you'll see a mottled texture in the upper and middle thirds of the balloon.
That’s because I blended and blended and blended and blended and then blended some more with all three colors.
I'm right on the edge of oversaturating the paper and in the process, I've used too much of every color.
There’s so much ink here that the solvent in the lightest formula is starting to break down the darker inks.
Mottling happens when the paper is right at the saturation point. The ink particles are so free and floaty that they start to coagulate and clump together into islands of pigment surrounded by pale solvent.
This is basically too much of a good thing.
Mottling can also happen when the lightest marker in your blending combination is a smidge too light for the overall blend… but most mottling is when students get way too confident, pushing the wet into wet technique more towards sopping into dripping.
The Fix:
Know when to stop.
There is a limit to how much wet ink a paper can hold.
Just because you can balance on the edge doesn’t mean you should.
More is not better.
In fact, with some Copic inks, more is worse.
If you load enough moisture into the paper, some inks will not just mottle, they’ll shatter.
Shattering is when an ink breaks down into its components. With a dark gray or black you'll see greens and purples start to ooze out.
Green inks can shatter with little yellow halos that often seep outside the boundaries of the image.
Purple and orange can leak reds or pinks.
Experience will teach you to quit while you're ahead.
Good colorers step back from the project to evaluate before they add more ink.
Are you trying to fix a truly bad blend or are you trying to fix a flaw so tiny that you're the only one who can see it?
In my experience, 60% of your mistakes are ones only you can notice. We're our own worst critics and nothing looks awesome from 3 inches away.
Step back and put the marker down! Learn to live with good instead of killing it in the quest for perfection.
So there you go-
5 more common mistakes and 5 solutions to prevent them from happening again.
Blocky coloring
Overlap those colors because inks that never touch can never blend.
Dry coloring
Don’t be afraid to use some ink. Blends can only happen when you use adequate moisture.
Using too much light ink
Smooth out your blends with more than one marker. Use both the medium and the light color, not just the lightest.
Shaggy coloring
Don’t dink around with sketchy strokes. Cover that paper in smooth and generous flicks!
Overstroking
I know it feels artistic and oh-so-professional to blend well but too much of a good thing leads to mottles and shattering.
Don't feel bad if you're guilty of more than one!
Heck, I've broken four or five of these rules on a single project. The key is to spot it happening and mentally slap yourself out of it before you take it too far!
Correcting mistakes and flaws in your technique is part of the learning process.
It's good for you!


